The Ultimate Guide to an Effective Gua Sha Routine
A Simple Skincare Habit That Could Help Your Face Feel Better
Gua sha is a simple skin care method that uses a smooth tool to gently massage the face and neck. Many people use it to help with puffiness, tension, and circulation. It can also fit into a daily skin care routine to support a more relaxed and refreshed look. From beginners to those looking to improve specific areas like the jawline or double chin, there are easy ways to add it to your day. This article will go over a basic gua sha routine, when to use it in your skincare steps, and how it can be helpful for different skin goals.
- Last Updated: July 16, 2025
-
-
What Is Gua Sha?
Before adding Gua Sha to your routine, it helps to know where it comes from and why it’s become a staple in many self-care habits. Though once used in traditional settings for health concerns, it now plays a major role in skin care and relaxation routines.
- Core technique: Gua Sha involves gently scraping the skin with a smooth-edged tool to promote circulation and reduce muscle tension.
- Historical background: It began in ancient China and was widely used to ease pain, clear heat, and support recovery.
- Belief in energy balance: Traditional users believed it helped move “qi” (energy) and blood through the body, supporting balance.
- Typical aftereffects: After scraping, it’s normal to see light red marks that fade within a few days—often seen as signs that the technique is working.
- Global adaptations: Variations exist in Vietnam (“coining”) and other Asian countries, where it was also a go-to remedy for fatigue or illness.
- Circulatory benefits: Gua Sha is used to improve circulation in areas where energy or blood may feel “stuck.”
- Skincare application: The facial gua sha routine uses a lighter touch and is often done in skincare routines for lifting and firming effects.
- Home-friendly routine: It’s often part of self-care routines thanks to how simple it is—no spa visit needed.
Today, gua sha is more than a wellness trend—it’s a calming ritual that fits easily into modern routines, offering both physical relief and a moment of mindfulness.
-
Benefits of Gua Sha for Face
Facial gua sha has become a go-to step in many skincare routines. It’s not just about relaxation—it also supports skin health in a way that’s simple and easy to stick with. When added consistently, a gua sha routine can help improve how your skin looks and feels.
- Fluid drainage and puffiness support: Using gentle strokes with a gua sha tool can help move excess fluid through the lymphatic system. This may reduce puffiness around areas like the eyes, cheeks, and jawline. People often notice that their face looks less bloated and more sculpted after just a few sessions.
- Circulation and natural glow boost: Gua sha encourages circulation by stimulating micro-blood vessels in the skin. Better blood flow means more oxygen and nutrients reach your skin cells, which can lead to a brighter complexion and a natural, healthy glow over time.
- Muscle tension and tightness relief: We tend to hold a lot of stress in our facial muscles—especially in the jaw, forehead, and temples. Gua sha works like a soft massage, helping to loosen those tight areas. This not only feels good but can also reduce the appearance of tension-related fine lines.
- Reduction of visible fine lines: Regular use is believed to support collagen and elastin production—two proteins that keep skin firm and bouncy. When used over time, gua sha may help soften the look of fine lines and create a more lifted effect, especially around the cheeks and jawline.
- Enhanced skincare effectiveness: Using facial oils or serums before a gua sha routine can make your skincare work more effectively. The tool helps spread products evenly and improves circulation, making it easier for ingredients to absorb into the skin. This can leave your face feeling plump, hydrated, and nourished.
Adding gua sha to your daily or weekly skincare routine doesn’t just help your skin—it’s also a great way to slow down, breathe, and give yourself a few mindful minutes each day.
-
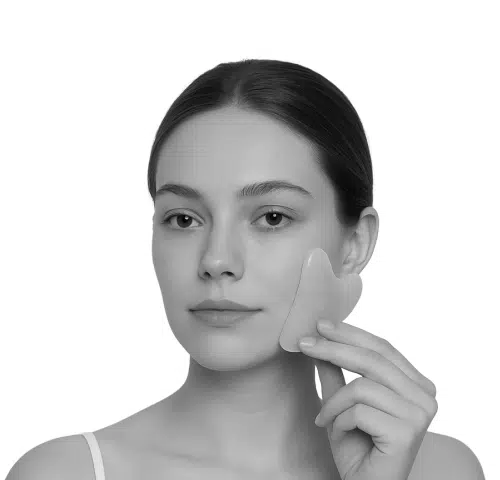
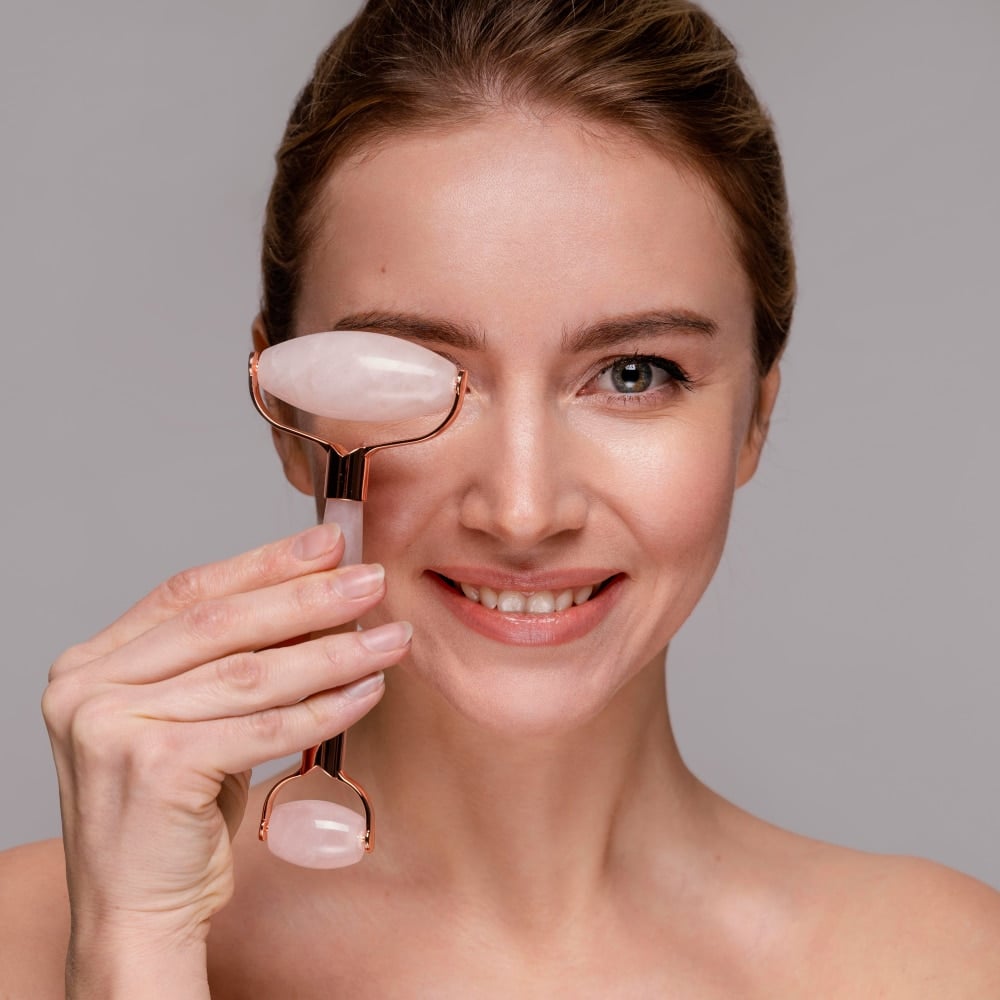
Facial Gua Sha Techniques
Doing gua sha on your face is all about being gentle and consistent. While the tools are important, how you use them plays the biggest role in how effective your routine will be. Getting the technique right helps your skin feel refreshed—without irritation or redness.
- Tool angle guidance: Hold the gua sha tool at a low angle, close to flat against your skin. This helps the tool glide smoothly without pressing too hard or digging in.
- Grip and stroke pressure: Use light to medium pressure. The strokes should feel relaxing, not uncomfortable. Hold the tool securely and avoid using sharp edges directly on your skin unless it’s meant for pressure points.
- Stroke path direction: Move from the center of your face outward and upward. For the neck, move strokes downward to help support lymph drainage. Each stroke can be repeated several times in the same direction.
- Neck technique overview: Tilt your chin and work from the base of the neck upward or downward (but not both in one motion). Use light pressure near the throat and more firm strokes along the sides.
- Jawline and chin approach: Start under the chin and sweep along the jawline toward your earlobe. A slight wiggle near the end of the stroke can help stimulate drainage.
- Cheek movement tips: Begin at the nose or corner of the mouth, then glide the tool outward toward your ear or temple. Use a broad surface for the best glide across the cheek.
- Under-eye motion advice: Use extra light pressure and a very flat angle. Gently move the tool from the inner corner toward the temple. Only 1–2 light strokes are needed.
- Brow and eye area method: Place the tool at the start of the brow and sweep out toward the tail and temple. This helps ease tension around the eyes and may give a lifted look.
- Helpful usage tips: Keep the tool in contact with the skin the entire time. Use your free hand to gently hold the skin in place if needed. Breathe deeply and move slowly.
- Sequence and flow: A typical order is neck → jawline → cheeks → eyes → forehead. You can do one full side of the face before switching to the other to make it easier.
- Session timing advice: A gua sha routine for the face usually takes 5 to 15 minutes. A few thoughtful strokes per area are enough—there’s no need to rush or overdo it.
Facial gua sha is more than a quick skincare step—it’s a hands-on way to feel more relaxed and refreshed. When done consistently, this part of your gua sha routine can support better skin tone, a calmer mind, and a smoother start or end to your day.
-
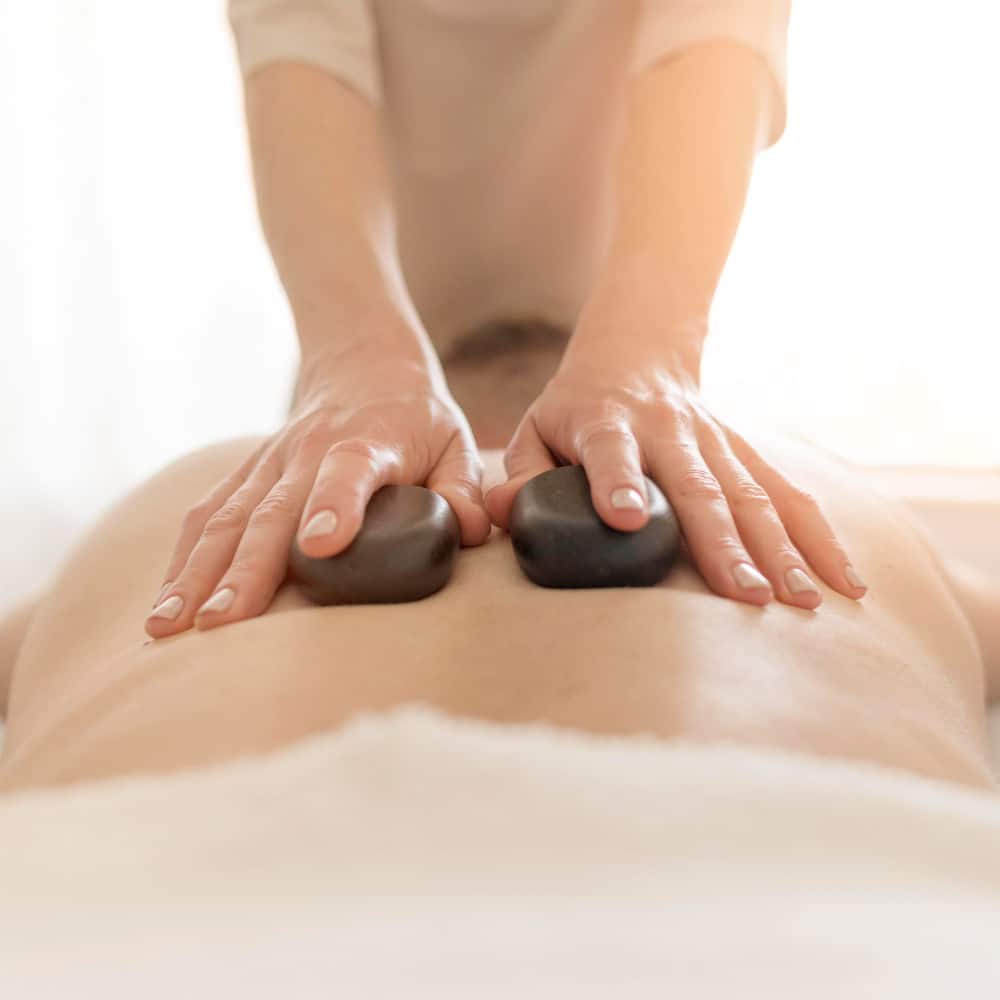
Body Gua Sha Benefits
While gua sha is often associated with facial skincare, its benefits go far beyond the face. Body gua sha can be a useful tool to ease tension, improve comfort, and support recovery—making it a helpful part of any full-body gua sha routine.
- Soreness relief and muscle recovery: Body gua sha is commonly used to ease soreness after workouts or long hours of sitting. The scraping motion helps release tight muscles and knots by increasing blood flow to the area. This boost in circulation can reduce stiffness in the back, shoulders, neck, or legs and support better mobility over time.
- Boost in circulation and waste removal: When scraped over the skin, gua sha encourages blood flow to the surface, often causing mild redness. This rush of blood brings oxygen and nutrients to the tissue, which may support recovery and help the body remove waste. Some also find it gives them a general “reset” feeling after a session.
- Lymph flow support and puffiness reduction: Scraping toward lymph-heavy areas like the armpits or thighs can stimulate lymph flow. This may help reduce mild swelling in the legs or arms and even lessen puffiness caused by water retention. It’s also why many people include gua sha in body care routines focused on circulation or cellulite.
- Improved flexibility through fascia release: Fascia is the connective tissue around muscles, and it can tighten or knot up. Gua sha puts pressure on these tight spots, helping release adhesions that may be limiting flexibility. This can make it easier to stretch, move freely, or relieve stiffness in areas like the thighs, hips, or neck.
- Relaxation effects and mental calm: A consistent gua sha routine isn’t just good for your muscles—it can also help you unwind. The scraping motion may have a calming effect, similar to a massage. People often say they feel more relaxed, less tense, and even sleep better after regular sessions.
Adding body gua sha to your routine can be a simple way to care for sore muscles, improve circulation, and create a moment of calm in your day. When used regularly, it can help you feel more flexible, less tense, and more in tune with your body—making it a rewarding part of your self-care habits.
-
Body Gua Sha Techniques
Body gua sha requires a slightly different approach than facial gua sha. It’s often more focused on relieving tension, soreness, or stiffness. While it can be more intense, it should still feel controlled and mindful—not rushed or painful. A few simple techniques can make a big difference in how effective your gua sha routine feels.
- Warming up the muscles: Warm muscles respond better, so it’s helpful to apply a warm towel or do gua sha after a shower. Sit or stand in a relaxed posture, and use a mirror for harder-to-reach areas like your back or neck.
- Using oil or lotion properly: Apply plenty of oil or lotion to avoid friction. Larger muscle areas need more slip, so don’t hold back. Work in sections, and reapply as needed.
- Stroke style and flow: Use long, steady strokes in one direction—usually along the muscle or toward the heart or lymph nodes. Don’t saw back and forth; one smooth motion per stroke is best.
- Techniques for upper back and shoulders: Stroke downward from the base of the skull toward the shoulder or mid-back. This follows the muscle lines and helps ease common tension areas.
- Guidance for arms: Stroke either upward toward the shoulder or downward, depending on your goal. Follow the muscle from wrist to elbow or elbow to shoulder for best results.
- Legs and lower body method: Move upward from the feet toward the hips. For calves, hamstrings, or quads, glide the tool along the full length of the muscle.
- Partnering for back strokes: Have a partner scrape from the spine outward, following muscle lines. Focus on the ribs or mid-back—not directly on the spine or bony spots.
- Sensitive zones to avoid: Skip the front of the neck, spine, inside elbows or knees, and any areas that feel sharp, thin, or tender. Gentle circles may work for the belly if done slowly and lightly.
- Managing your pressure: Use a steady, moderate pressure that feels like a deep massage. Redness is normal, but you should never be in sharp pain. Adjust the pressure if needed.
- Stroke count suggestions: Aim for 4–8 strokes per area. Watch for signs of redness or heat—these often mean you’ve done enough. Some spots might need more time, but stop if it feels sore.
- Releasing tight knots: If you find a tense spot, gently scrape over it a few times. Avoid jabbing or fast movements—consistent, smooth strokes are better.
- Post-session care steps: Wipe off excess oil and avoid direct cold or exercise right after. Cover the area if possible and let your body rest before doing more.
Done properly, body gua sha feels like a strong but satisfying release. It can ease tight spots, improve circulation, and give you a break from everyday tension. A regular gua sha routine can be a useful part of recovery or stress relief, especially when done with patience and care.
-
Potential Risks and Precautions
Gua sha is often praised for its simplicity and benefits, but like any skin-focused practice, it’s important to use it with care. Knowing what to avoid and how to treat your skin afterward can help you get the most out of your gua sha routine—without unwanted side effects.
- Discoloration and mild bruising: It’s common for gua sha, especially on the body, to leave red or purple marks. These usually fade in a few days and are a normal reaction to increased circulation. If the area looks irritated, let it fully recover before going over it again.
- Muscle sensitivity after use: Some areas might feel sore after a session, much like they would after a deep massage. If the pressure feels sharp or painful, you’re pressing too hard. Aim for a firm but comfortable glide.
- Skin damage prevention: Gua sha tools should never break the skin. Always use a smooth-edged tool with oil or balm. Avoid areas with cuts, sunburn, rashes, or breakouts to prevent irritation or infection.
- Hygiene and cleanliness needs: Since gua sha can create tiny skin openings, it’s important to clean both your skin and tool before and after each use. This helps lower the chance of bacteria entering the skin.
- Cases where gua sha isn’t advised: Some people should skip gua sha or ask a healthcare provider first. That includes those with fragile skin, bleeding issues, certain implants, or serious skin conditions. If you bruise easily or are on blood thinners, gua sha may not be right for you.
- Skincare steps after the session: After a session, the treated skin may be more sensitive. Avoid direct sunlight, saunas, or hot baths for a while. Keep the area moisturized and give your body time to rest, especially if you notice any visible marks.
With a bit of attention and care, gua sha can be a safe and soothing addition to your routine. Just take your time, listen to your body, and treat your skin gently—especially if you’re new to the practice or doing a full-body gua sha routine for the first time.
-
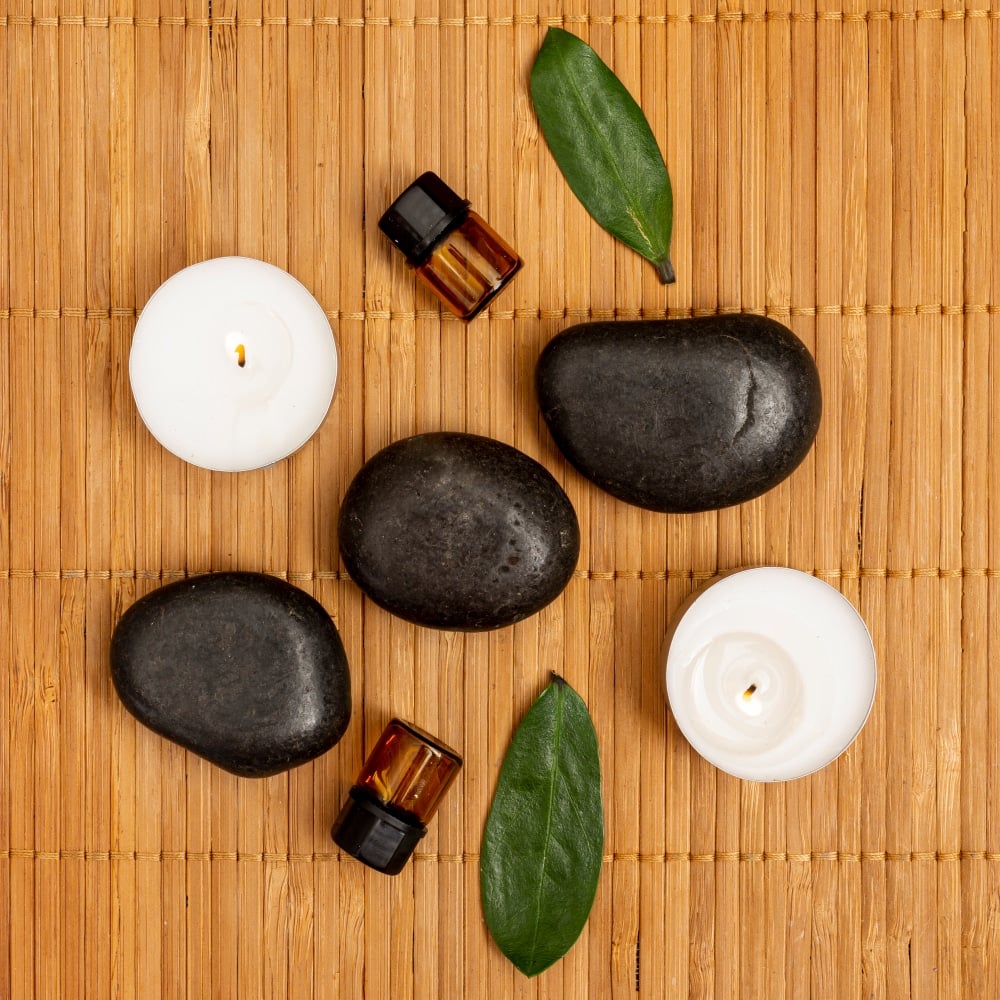
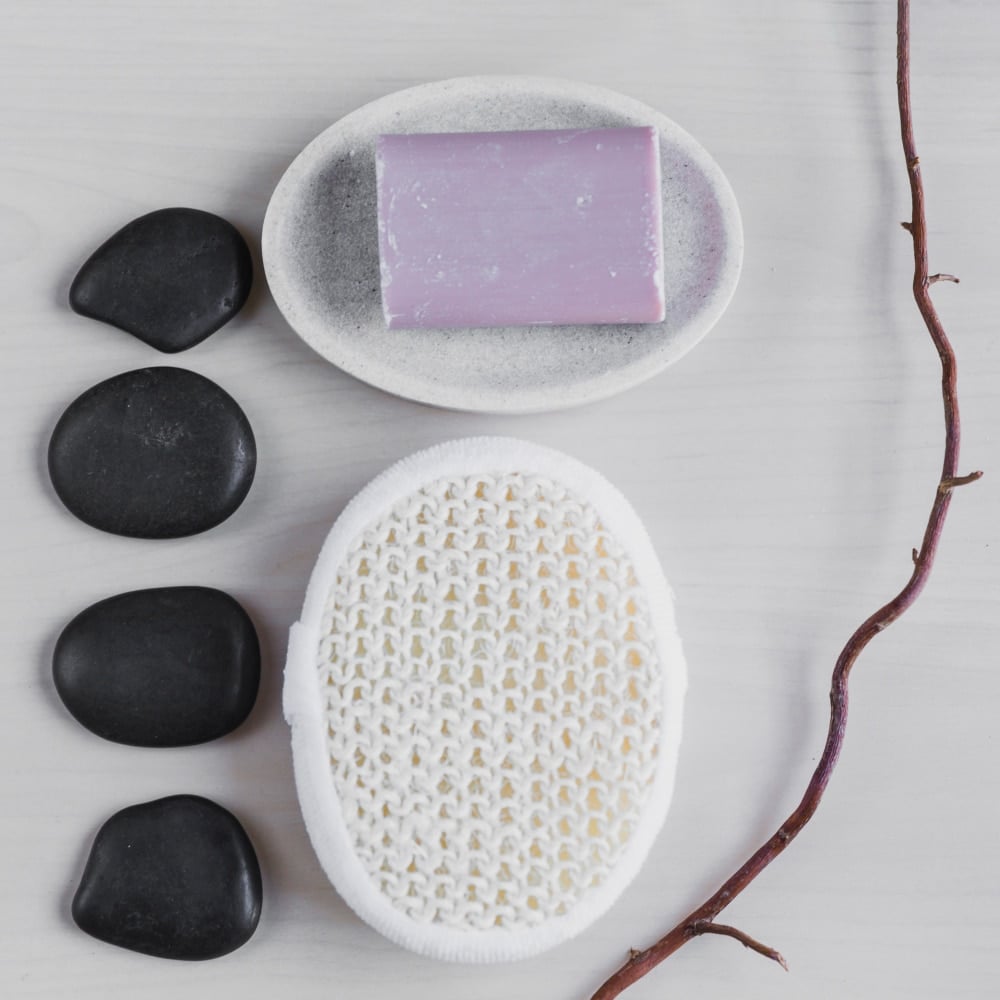
Gua Sha Routine Tools
You don’t need a complicated setup to get started with gua sha. A few basic tools and the right products can make your routine more effective and more enjoyable. Choosing items that are safe and easy to use will help you build a practice that feels good and fits into your daily habits.
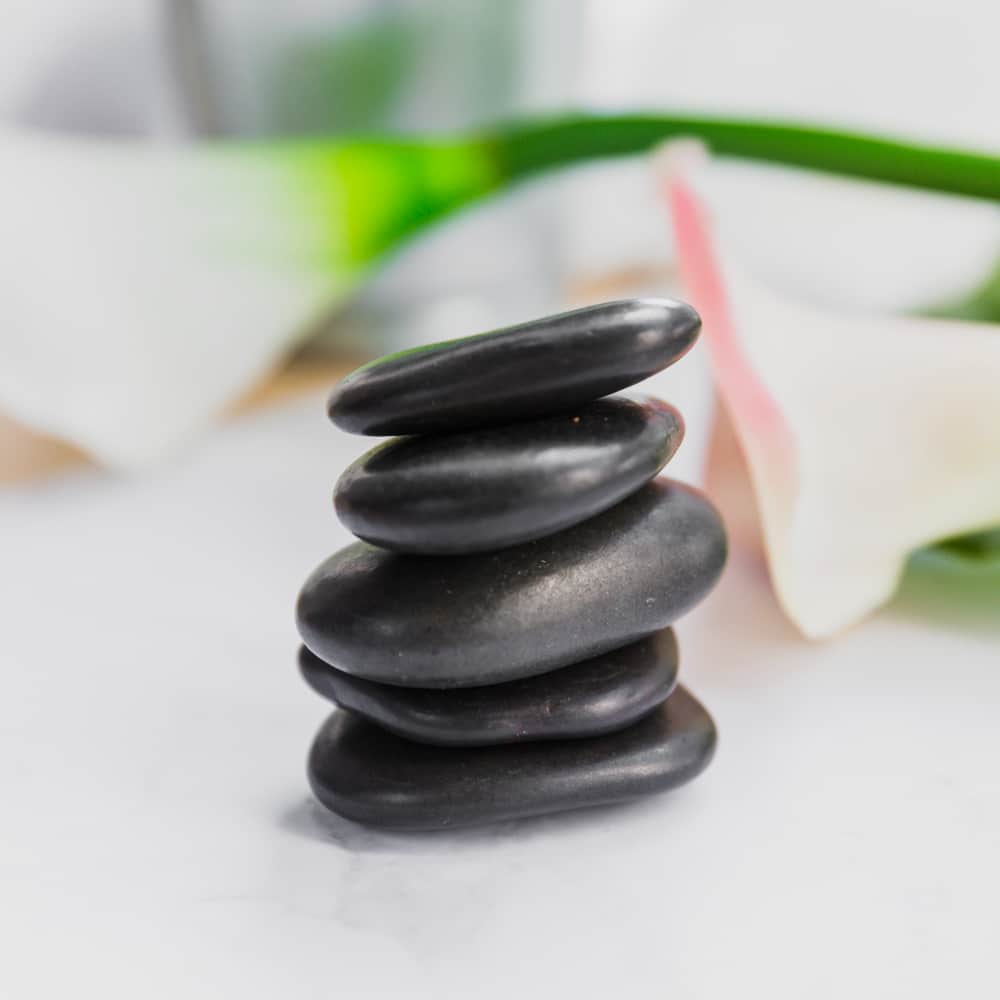
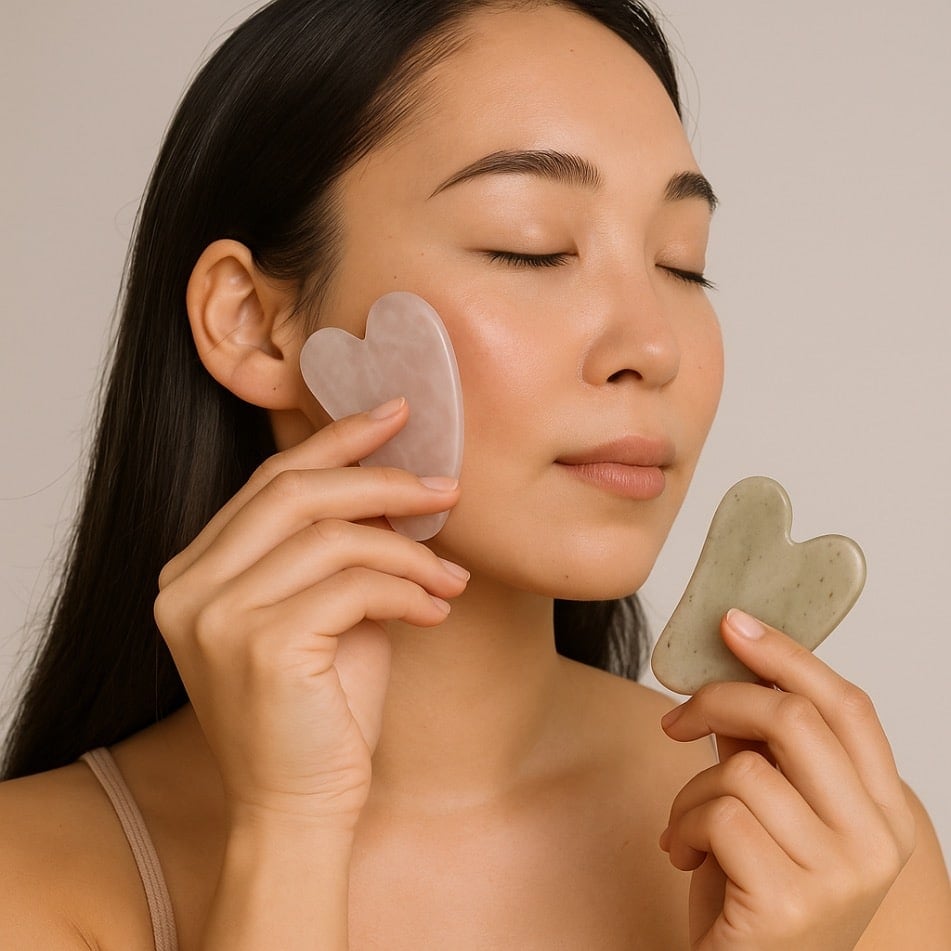
- Essential tool selection: Use a smooth-edged massage tool made for gua sha. These tools often come in materials like jade, rose quartz, or stainless steel and vary in size depending on the area being treated.
- Stone shapes for facial use: Flat stones with curves and notches work well along the jawline and cheekbones. Stones like rose quartz and jade are commonly used because they stay cool and glide gently across the skin.
- Preferred tools for body work: Larger tools or boards with wide surfaces are better suited for areas like the back or thighs. Stainless steel is often preferred for body work because it’s easy to clean and doesn’t absorb oils.
- Tool quality and care: Choose tools with rounded edges and no chips or sharp points. Always wash them before and after use, and be cautious not to drop stone tools on hard floors—they can crack easily.
- Support from facial oils: A light layer of facial oil helps the tool move smoothly and protects the skin. Options like jojoba, almond, or grapeseed oil are common, and just a few drops are usually enough.
- Body care product suggestions: The skin on the body can handle richer products, so thicker oils or balms are often used. Look for ingredients that help with soreness or tension, such as ginger, arnica, or peppermint.
- Cleansing and hydration steps: Start with clean skin to avoid pressing dirt or makeup into your pores. After the session, wipe off excess oil if needed and apply a light moisturizer to keep skin hydrated.
- Soothing add-ons if needed: If your skin feels tender or bruised after a gua sha routine, soothing gels like arnica or aloe can provide extra relief. Cool compresses or chilled tools may also help reduce redness.
Having the right tools on hand makes a big difference in how your gua sha routine feels. With just a few thoughtful items, you can set yourself up for a relaxing, skin-friendly ritual that fits easily into your day.
-
Gua Sha Routine Tips
Starting a new habit can feel overwhelming, but gua sha is easy to maintain once it fits into your routine. Whether you’re using it for your face, your body, or both, the key is to keep it realistic. These tips can help you stay consistent and get more out of your gua sha routine over time.
- Begin with manageable sessions: Start with short sessions 2–3 times a week instead of long, occasional ones. For facial gua sha, 5–10 minutes is usually enough. Body gua sha might be done weekly, especially when you’re feeling extra tight or sore.
- Timing matters: Morning gua sha can help with puffiness and wake you up, while evening sessions are better for winding down or relaxing tight muscles. Pick the time that fits best with your lifestyle.
- Link it to your daily habits: Attach gua sha to things you already do. You can add facial gua sha after your skincare steps or do body gua sha after stretching, workouts, or even warm baths on weekends.
- Pay attention to how your skin feels: If your skin feels irritated or overworked, ease up. Let areas rest between sessions, and adjust based on how you feel. More isn’t always better—pay attention to tension spots or soreness.
- Focus on hydration and recovery: Stay hydrated and eat nourishing foods when doing gua sha, especially for the body. Some people also pair it with supplements like magnesium to support recovery.
- Create a calming environment: Treat gua sha like self-care time. Light music, quiet space, or simply a few calm breaths can help make the practice something you enjoy—not just another task.
Building consistency doesn’t mean doing more—it’s about doing what works for you, regularly. With time, your gua sha routine can feel like second nature, offering real relief and visible results without needing much effort at all.
-
Sample Gua Sha Routine
Step 1: Preparation (Cleanse and Warm Up)
A smooth and effective gua sha routine begins before the tool even touches your skin. Proper preparation sets the tone for a calm, effective session—and helps avoid irritation or clogged pores later.
- Wash your face first: Use a gentle facial cleanser to remove sunscreen, makeup, or dirt. This gives the gua sha tool a clean surface to glide on.
- Loosen up your muscles: If you’re doing body gua sha, take a warm shower or use a warm towel on the target area. This helps muscles loosen up and prepares the skin.
- Sanitize your tool: Always use a clean gua sha tool. Wash it with soap and warm water before the session to keep things hygienic.
- Organize your supplies: Set out facial oil or serum for your face, and body oil or lotion if you’re also working on your body. Keep a towel nearby to wipe off excess oil later.
- Settle into position: Sit or stand in a relaxed position. If you’re doing your neck or shoulders, a mirror can help guide your strokes.
- Secure your hair: Keep your face clear by putting your hair up so it doesn’t interfere with the tool or oil.
- Center yourself mentally: Before starting, breathe slowly and deeply. This helps shift your focus and ease into the routine with a calm mindset.
Getting ready with care not only helps your skin respond better, but also helps turn your gua sha routine into a moment of quiet time you can look forward to. With everything in place, you’ll be ready to move into the technique with ease and intention.
Step 2: Apply Oil or Lubricant
Using the right product before you start can make all the difference. A small amount of oil creates the glide your tool needs to move smoothly—helping you avoid tugging, redness, or irritation.
- Face prep with oil: Gently pat your skin dry after cleansing, then apply a few drops of your preferred facial oil or serum. Spread it evenly so your skin feels slick—not dry or tacky.
- Top up as needed: If the oil begins to absorb too quickly while you’re still working, don’t hesitate to add a bit more. Slippery skin protects your face and keeps the tool moving easily.
- Body area coverage: Apply body oil or lotion to the areas you plan to focus on—such as your neck, shoulders, or calves. Rub the product in lightly so the skin feels soft and coated, not greasy.
- Divide your session if needed: You can oil your face and body at separate times if needed. For example, finish the face first, then move on to oiling the lower legs or upper back.
- Texture check: The goal is skin that feels smooth and moisturized—not soaked. If you feel any dragging, apply more product before continuing.
Adding this step to your gua sha routine helps protect your skin and ensures the tool glides the way it should. It’s a small detail, but skipping it can lead to discomfort—so take a moment to prep your skin right.
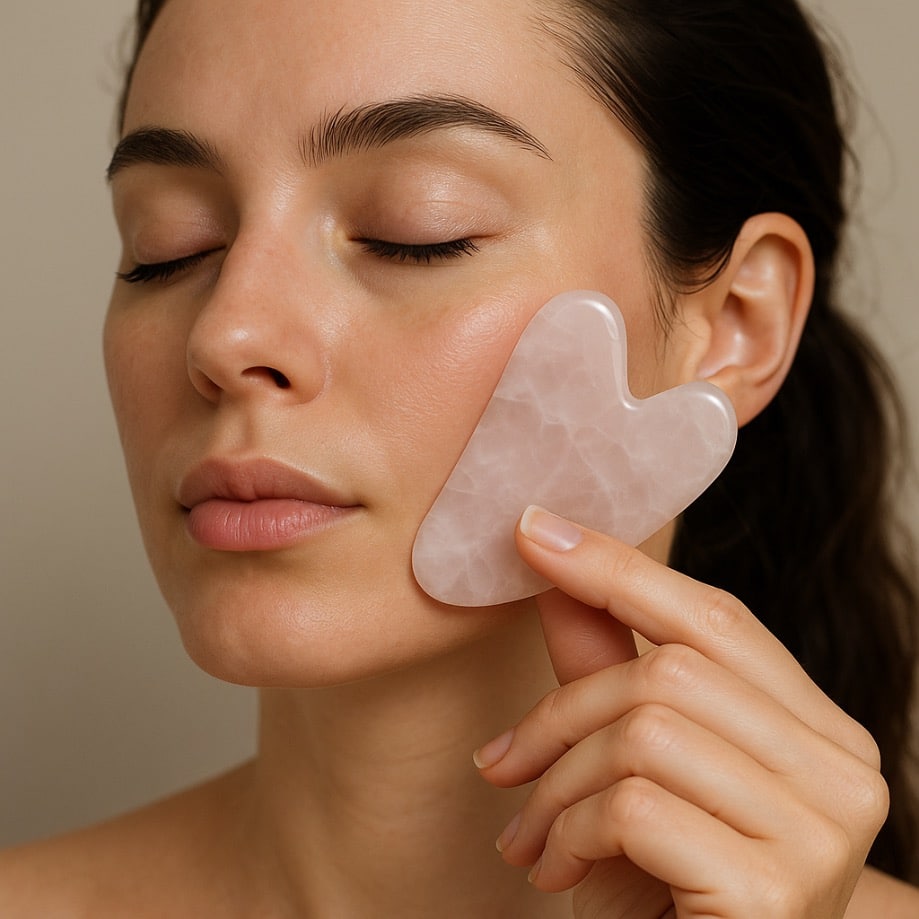
Step 3: Facial Gua Sha Massage
Now that your skin is prepped and your tool is ready, it’s time to start the actual massage. This step is where you’ll see and feel the difference—if done consistently and gently, the effects can build up over time. Go slowly, follow a pattern, and let your hands move with intention.
- Neck strokes: Start on one side. Glide the tool from below your earlobe down the side of your neck to your collarbone. Repeat about three times, then switch to the other side. Optional upward strokes on the back of the neck can help with tension.
- Jawline movement: Place the tool at your chin so it hugs your jaw. Sweep along the jawline toward the ear using medium pressure. Repeat around five times on each side, ending with a gentle wiggle near the ear to support drainage.
- Cheek technique: Begin beside your nose and move outward across the cheek toward the ear or temple. Cover mid-cheek to cheekbone with broad, gentle strokes. Use a slightly firmer touch for lifting effect.
- Delicate under-eye strokes: Use ultra-light pressure and a very flat angle. Glide from the inner corner under the eye out toward the temple. One or two passes per side are enough.
- Forehead and brow glide: Stroke from the brow center to the temples, then glide upward from the middle of the forehead toward the hairline. Cover the entire forehead using wide strokes to release tension.
- Final massage steps: End the facial massage with a few soft downward strokes from the ears to the collarbone to clear fluid buildup and finish the flow pattern.
A facial gua sha routine doesn’t need to be long to be effective. With just 5 to 10 minutes of slow, thoughtful strokes, your face can feel more sculpted, your skin can look more refreshed, and your mind may feel a little more at ease.
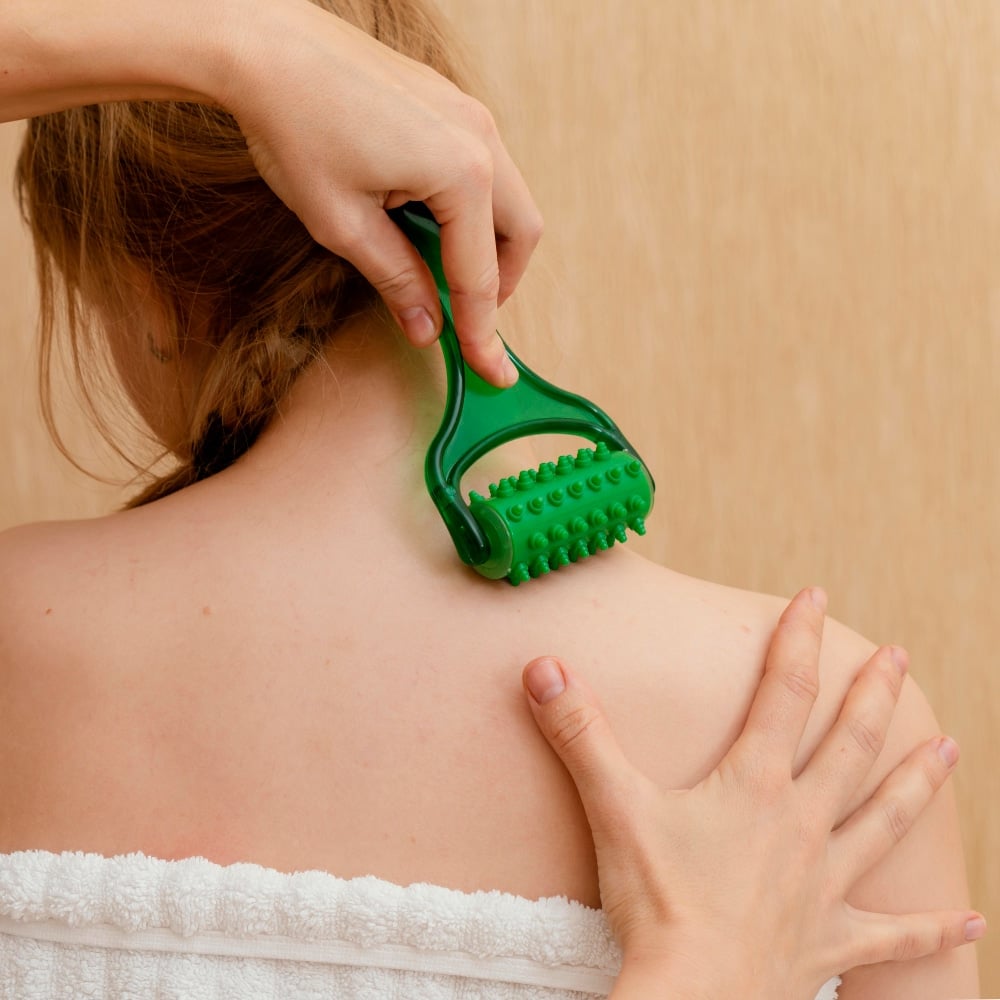
Step 4: Body Gua Sha
Once your face massage is complete, it’s time to shift focus to your body. Areas like the neck, shoulders, and calves tend to store a lot of tension—and using the right pressure here can bring fast relief. Take your time and work with your body, not against it.
- Technique for shoulders and neck: Tilt your head slightly to the side to expose the neck. Start at the base of the skull and glide the tool downward toward the outer shoulder. Use the flat edge and a steady, firm pressure. Vary the angle slightly to cover the full area. Focus on the upper trapezius muscle if it feels tight. You can use your opposite hand to reach and scrape along the shoulder in short, steady strokes.
- Handling tension spots: If you find a sore or stiff spot, apply slower or shorter strokes with mild pressure. This helps release the tightness without pushing too hard.
- Working on the calves: Sit in a position where you can comfortably reach your lower legs. Begin above the heel and scrape up the back of your calf toward the knee. Repeat 4–5 times per side. After the back of the calves, glide up the inner or outer calf based on what’s most comfortable.
- Optional leg areas: You can also lightly scrape the front of the lower legs (shins), but use a softer touch here as the bones are close to the surface. If you prefer, skip this area entirely and stay with just the calves.
Working through these key areas can help you feel looser, especially after a long day or workout. Over time, this part of your gua sha routine can become a helpful reset—relaxing overused muscles and giving your body a subtle, satisfying release.
Step 5: Aftercare
Once your Gua Sha session is complete, it’s important to treat your skin and body with care. This final step helps you lock in the benefits, prevent irritation, and get the most out of the time you spent on your practice.
- Remove leftover oil gently: Use a soft towel to gently pat away any remaining oil from your face and body. If your skin feels greasy, rinse with warm water or a gentle cleanser. You can also let the oil soak in as added moisture.
- Keep skin moisturized: On the face, layer a light moisturizer or night cream to help your skin stay soft and plump. For the body, apply a body lotion if your skin feels dry.
- Target soreness if needed: If any area looks red or feels tender, you can apply a calming gel like aloe or a soothing cream. This is especially helpful for shoulders or calves after focused work.
- Loosen up with light stretches: Light stretching can help you feel the difference in range of motion. Try gently pulling your toes or rolling your shoulders to notice where the tension has eased.
- Wash your tool properly: Wash your gua sha tool with warm soapy water. Dry it thoroughly and store it in a clean, dry place. Regular cleaning helps keep it hygienic and ready for your next session.
- Pause and reset your body: Take a moment to sit quietly, sip water or herbal tea, and let your body settle. If it’s nighttime, this can help prepare you for rest. If it’s daytime, notice how much lighter you feel afterward.
Ending your Gua Sha routine with proper aftercare helps protect your skin and support recovery. It’s not just about results—it’s about treating yourself well and making this practice something you want to return to again and again.
-